
How to build a bird lantern
Step 1:
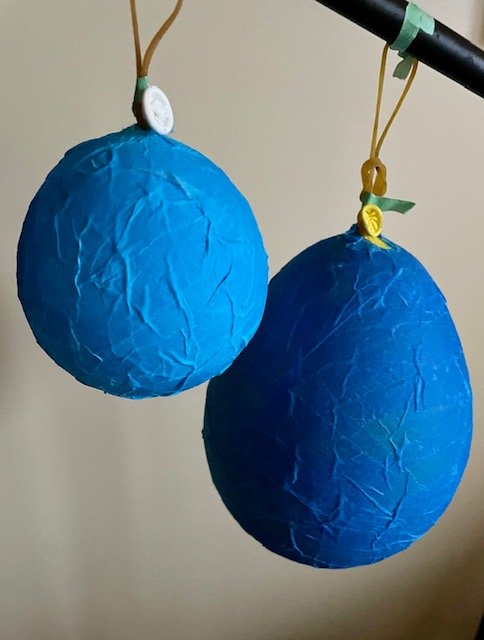
Step 1: Wash 3 complete layers of tissue paper strips onto two balloons, one small and one 8”. Let dry.

Step 2:
Burst both balloons. Attach the small one to the larger at what would be a bird’s head position, the tie end of the big one being the tail. Before attaching cut a circle out of each where they join so the light will pass into the head from the cavity.

Step 3:
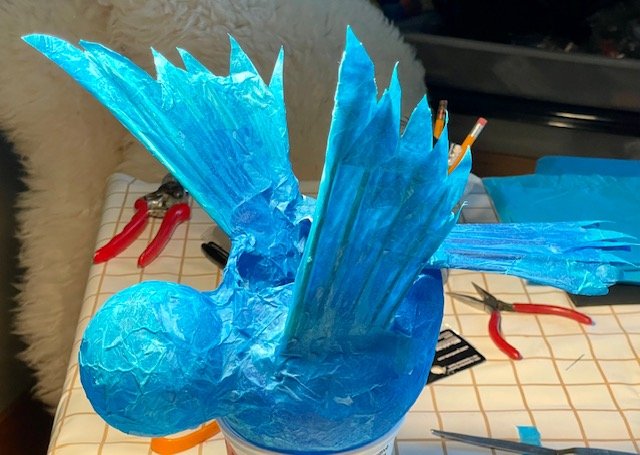
Prepare the wings and the tail. Here I’ve used bamboo skewers but curved slender willow whips would give a different but more natural effect.
Step 4:
Cut an opening on the back behind the head and between the wing position for light installation and operation.
Step 5:
Attach wings and tail. Here I cut slits into the body and installed them by attaching to the interior cavity for extra rigidity. Layer on more tissue strips at the joints to blend them with the body.

Step 6:
Add a beak by making a tiny cut in the head. I used the tip of a skewer which I then papered with black tissue.

Step 7:
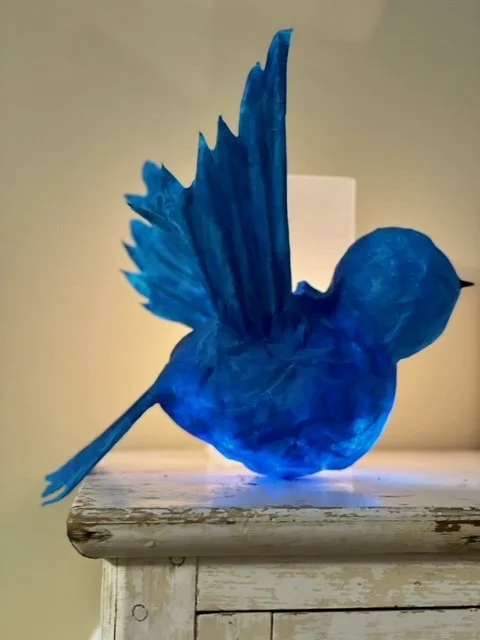
Find 2 balance points and attach a line for hanging. Here fishing line was used attached to the wings.
Step 8:
Install appropriate lights. I chose a string of 25 small bulbs powered by 3 AA batteries. (Darker structures require stronger light sources.)
There are so many bird possibilities so why not give it a go?