

How to make and integrate foliage (or flowers) into a lantern:

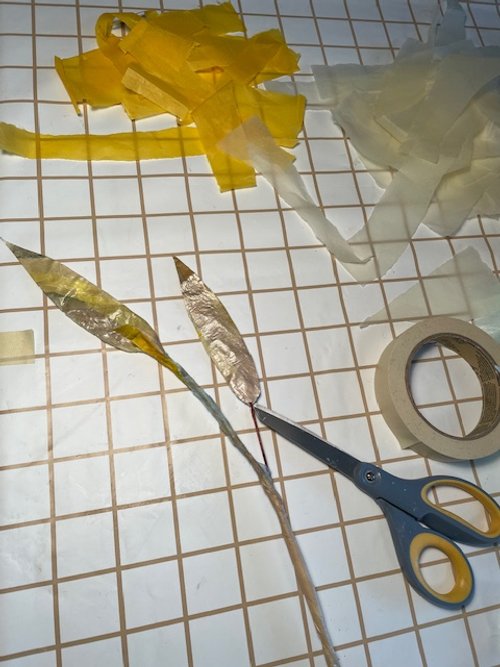
Step 1: Choose and layer appropriate coloured strips of tissue to both sides of a sheet of tinfoil with a brush and dilute white glue. Let dry.
Step 2: Apply Mod Podge to both surfaces and let dry.
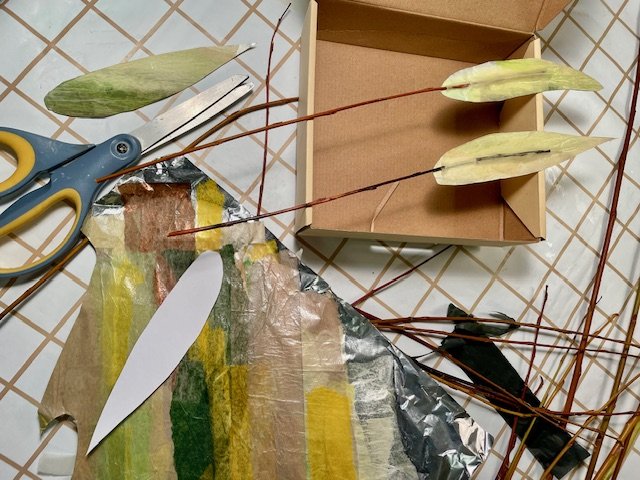
Step 3: Draw outlines and cut out the shapes required. I had a bit of de lamination happen at this stage of which I corrected with a dab of glue and a clothespin.
Step 4: Anchor each leaf to a slender willow twig with a thin strip of masking tape.
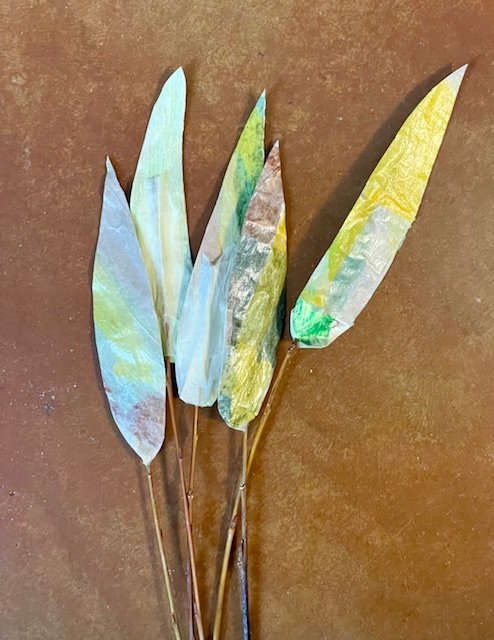
Step 5: Apply tissue strips to the stem and leaf base to make them one. Let dry and apply a coat of Mod Podge.
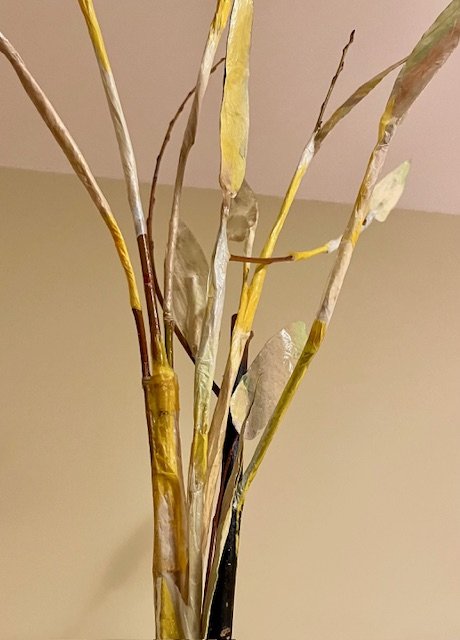
Step 6: Anchor your twigs to branches with masking tape (if a bigger spray is the goal) and cover them with tissue strips and then MP.

Step 7: Add them to your lantern arrangement and install lights if desired.
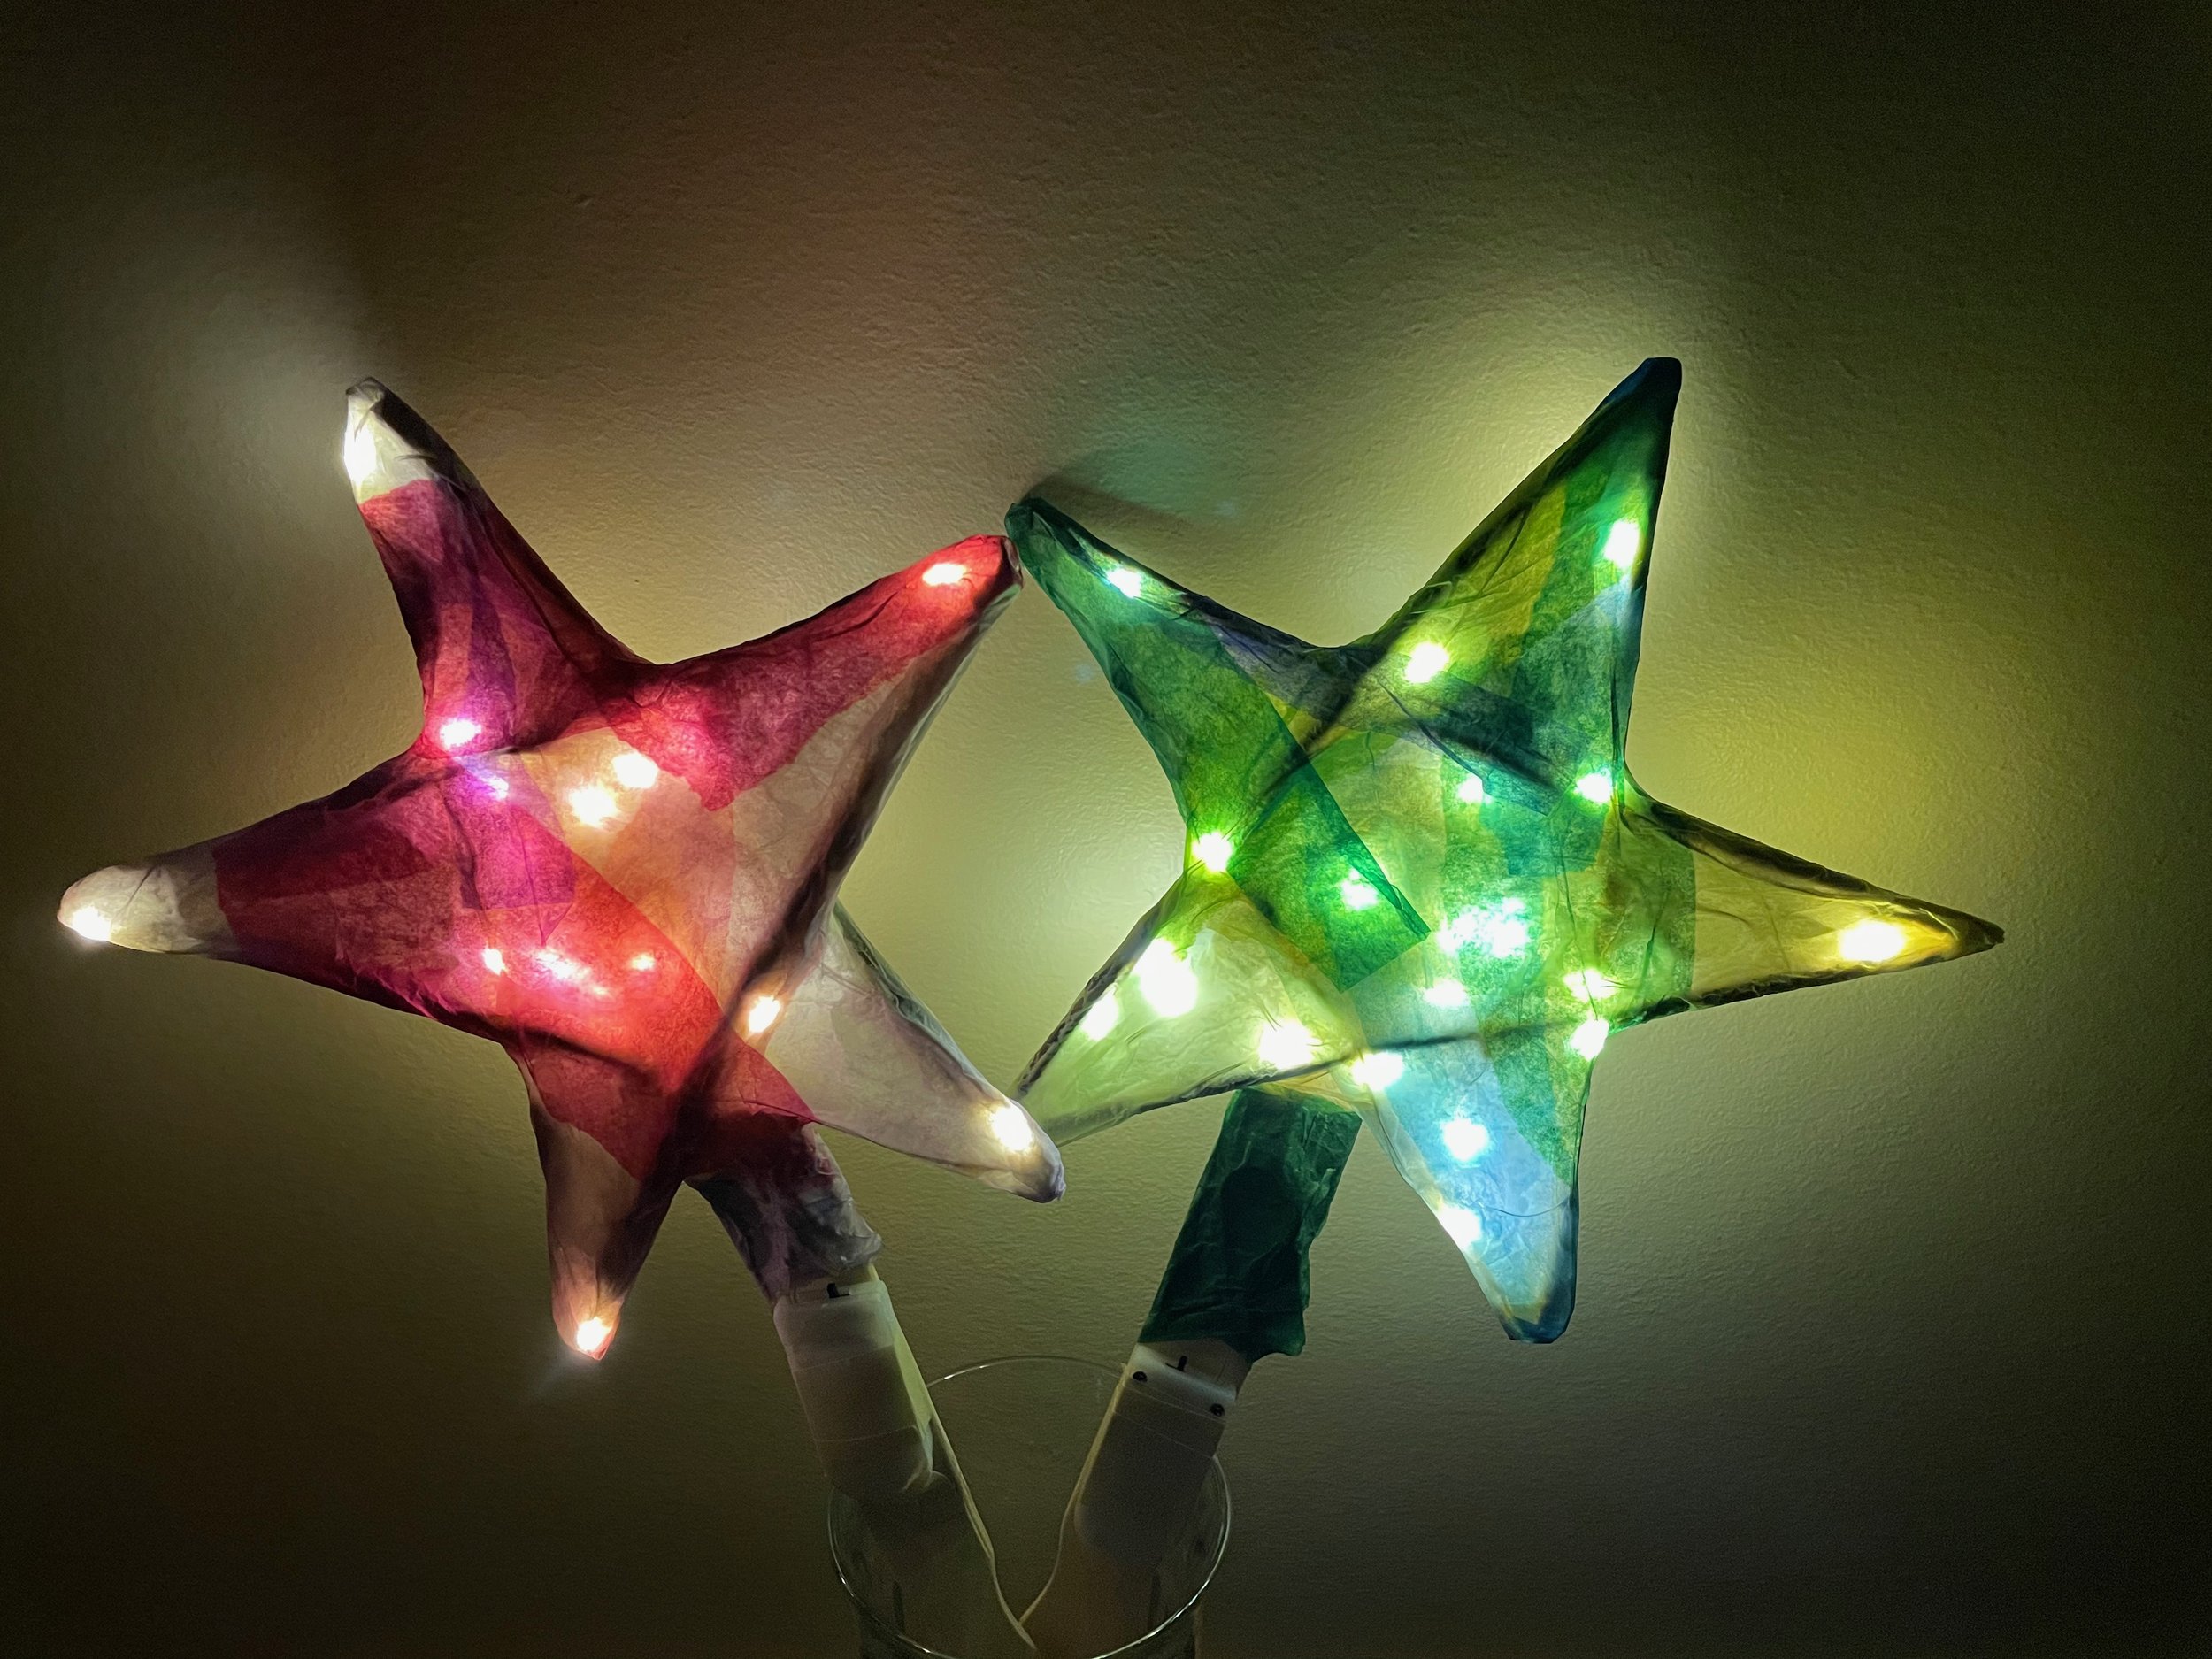
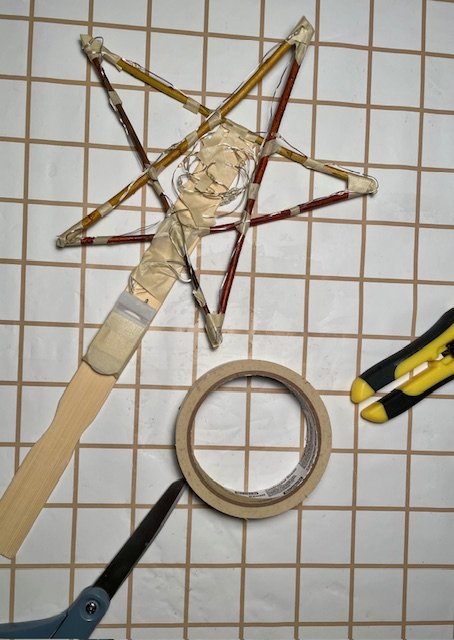
How to build a 2D lantern on a stick

Build a frame out of willow (or wire) attaching with masking tape and mount it securely to a stick. I prefer a paint stick.

Carefully space and anchor a string of waterproof tiny lights to the frame. I use tiny strips of masking tape for this purpose. Anchor the battery and switch box to the stick.
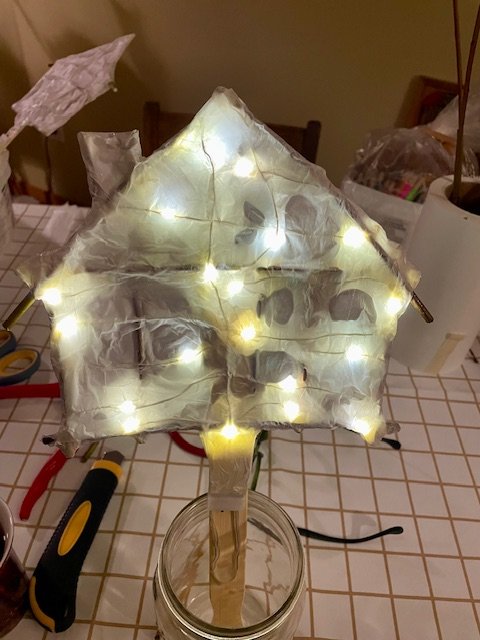
Using dilute glue, paint brush and torn strips of tissue paper cover with several layers. Both sides. I prefer to do this with white paper to allow the best light passage
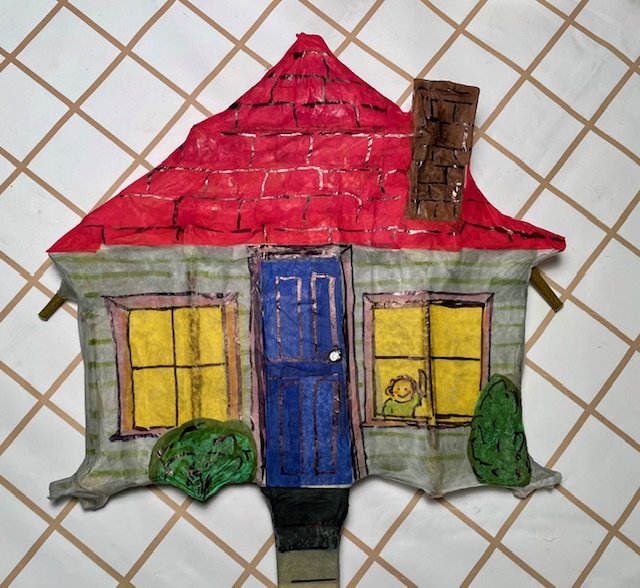
As a final layer add colour and shapes. Let dry and add details with marker pens if desired.

Coat with waterproof Mod Podge for durability and gloss if desired.
Switch it on and enjoy!

Here are some possibilities, finished and otherwise.

How to make an elephant lantern.

Step 1:
Paper 2 balloons with tissue paper and dilute glue. One larger than the other = body and head. Here white tissue was used for base layers. Hang to dry.
Step 2:
Pop balloons. Adjust body shape by cutting in half longitudinally, removing a 1/2” strip on each half and reconnecting with masking tape and then tissue strips. Prepare 4 legs by rolling up lengths of card stock and taping.

Step 3:
Shape the head by adding a trunk and ears.
Step 4:
Using your final layer tissue colour choice paper all with strips and dilute glue. Let dry. The feet can be shaped as here by wrapping on thin rolls of tissue.
Step 5:
Attach legs and head, holding in place with masking tape.

Step 6:
Paper all and let dry.

Step 7:
Add a tail.

Step 8:
Add tusks.
Step 9:
When completely dry do any touch ups and strengthening required.
Step 10
Cut an opening on the back for installing lights. Attach a latch. Attach one or two hangers. Paper clip pieces work well. Paper over these for additional strength.
Step 11:
Touch up and let dry.
Step 12:
Add lights to the cavity. Here a string of 25 LEDs powered by 3 AA batteries was used.
Step 13:
Off to the parade and festivities on January 28th with your beautiful lantern.

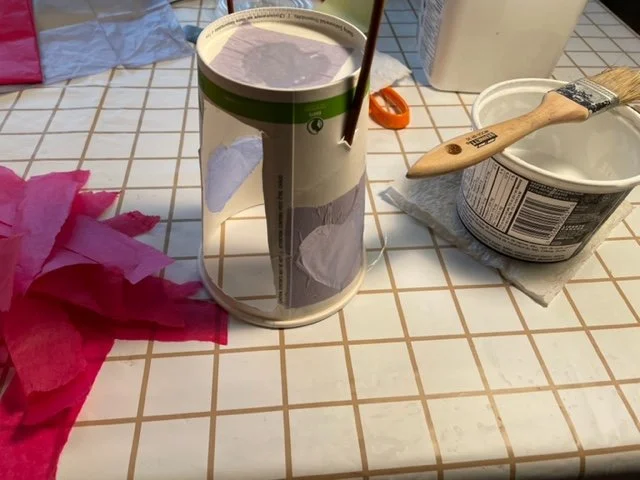
How to make a lantern from a takeaway container.

This lantern was designed to be made with small children. It’s quick, cheap, light and attractive.
Step 1:
Acquire a takeaway disposable paper soup container (larger size) with lid.

Step 2:
Cut a design carefully into the sides and bottom with an Exacto knife being careful to leave enough of the structure to be stable.

Step 3:
Remembering that the bottom is now the top, cut two small horizontal slits to insert a slender willow handle. Anchor it on the inside with masking tape.
Step 4:
Now is the fun part. Using dilute glue and tissue paper strips cover the cup (separated from the lid) completely. This can be done by small children with supervision. Leaving a 1/2” strip below the rim without paper in order to attach the lid which now is the base is recommended In hindsight with these prototypes I regretted not doing so. Let dry.

Step 5:
Attach a holder for an LED tea light to the inside of the lid. Photo shows 2 possible holders.

Step 6:
Insert the tea light and snap on the base/lid. Step back and admire your handiwork.

How to make a teddy bear lantern
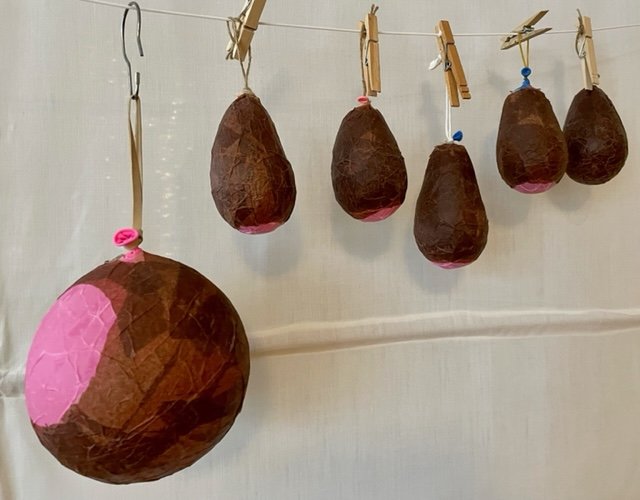
Step 1:
Blow up enough small water bomb balloons to make 4 legs and a head. Also inflate a larger balloon to approx. 6” in diameter. Tear an adequate amount of tissue strips to paper all of them with 3 complete layers. For this bear I kept the torn strips to about 1/2 to 1” wide and max. 6” in length. The narrower the strips the smoother the end finish. (This takes patience but represents the bulk of the required work for this project.) Hang them all to dry overnight.
Step 2:
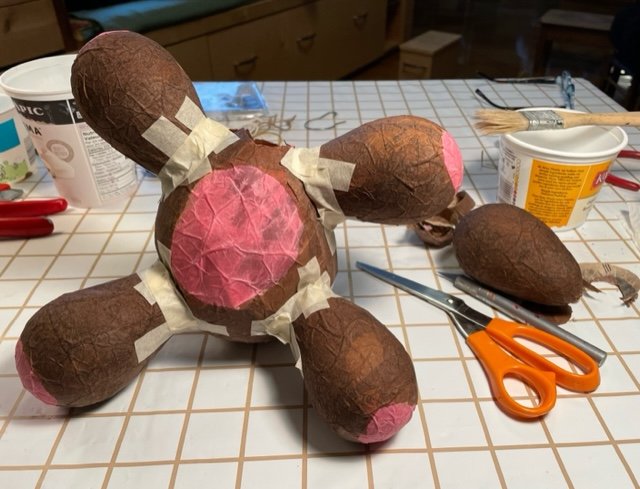
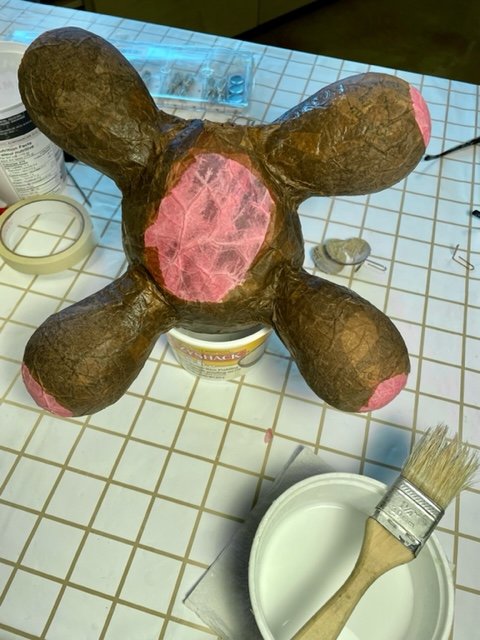
Pop the balloons. Because I didn’t want a round tummy I cut the body balloon longitudinally around the middle and took approx. 1/2” off each half. It made a more pleasing toy bear body shape but meant making a seam to rejoin the halves.
Step 3:
With an exacto knife cut openings for arms and legs in the body. Also trim the narrow ends of the limb balloons so they can be joined with good sized openings to allow for light transfer. Attach them firmly with masking tape.
Step 4:
Using matching tissue strips paper over the joints. Let dry completely before proceeding.
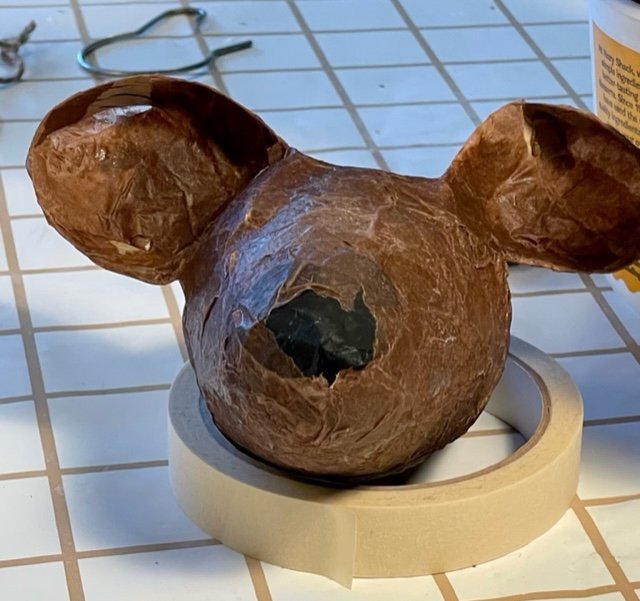
Step 5:
Make ears and trim the head balloon to match an opening cut for a neck in the body balloon. Let dry.

Step 6:
Attach the head in the same manner as the limbs. First I added two mini light strings to the cavity with the batteries left hanging outside. Because I anticipated adding a ribbon and bow I built a 1/2” collar and attached it between the body and the head. Paper over the joint and let dry.
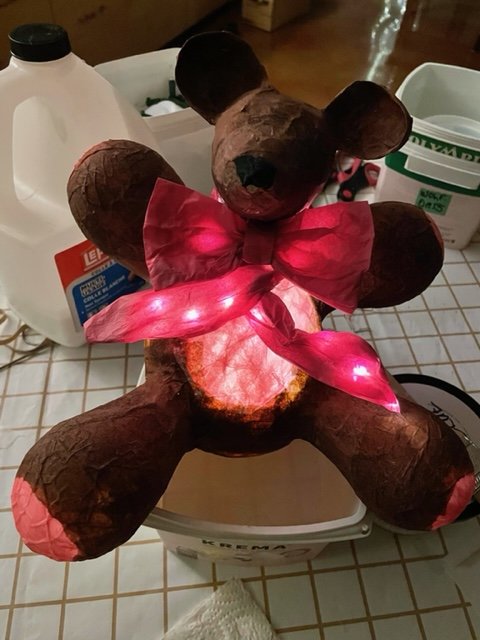
Step 7:
To make the bow tie first prepare a 6” wide strip long enough to wrap the neck and leave tails. Fold a string of mini lights into it laying them out along the length as it is folded in towards the centre and repeat once more so there are approx. 3 parallel lines of lights in what is now roughly an inch and a half wide strip. Use the dilute glue and brush to lightly make the layers adhere. Once wrapped around the neck like a scarf apply more of the glue mixture gently with the brush to stiffen it in place. Let dry.
Step 8:
Make a matching bow and glue it lightly together. Attach it with full strength white glue.
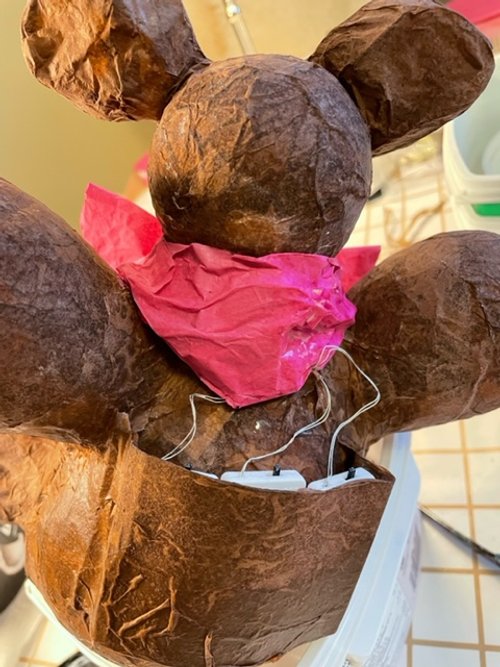
Step 9:
To house the batteries while having the switches accessible fashion a pouch from card stock papered to match the bear. Let dry and attach with masking tape and then paper over.

Step 10:
Step 10: Using a curved needle pierce the crown and attach fishing line from which the bear will hang. I added a fishing swivel so he can rotate gently.
Look it over carefully and make necessary minor adjustments. I find the fine wire of the mini lights breaks through wet tissue so patch any of those.
These directions would transfer readily to any sort of 2 or 4 legged creature. Let your imagination run wild. Eeyore anyone?
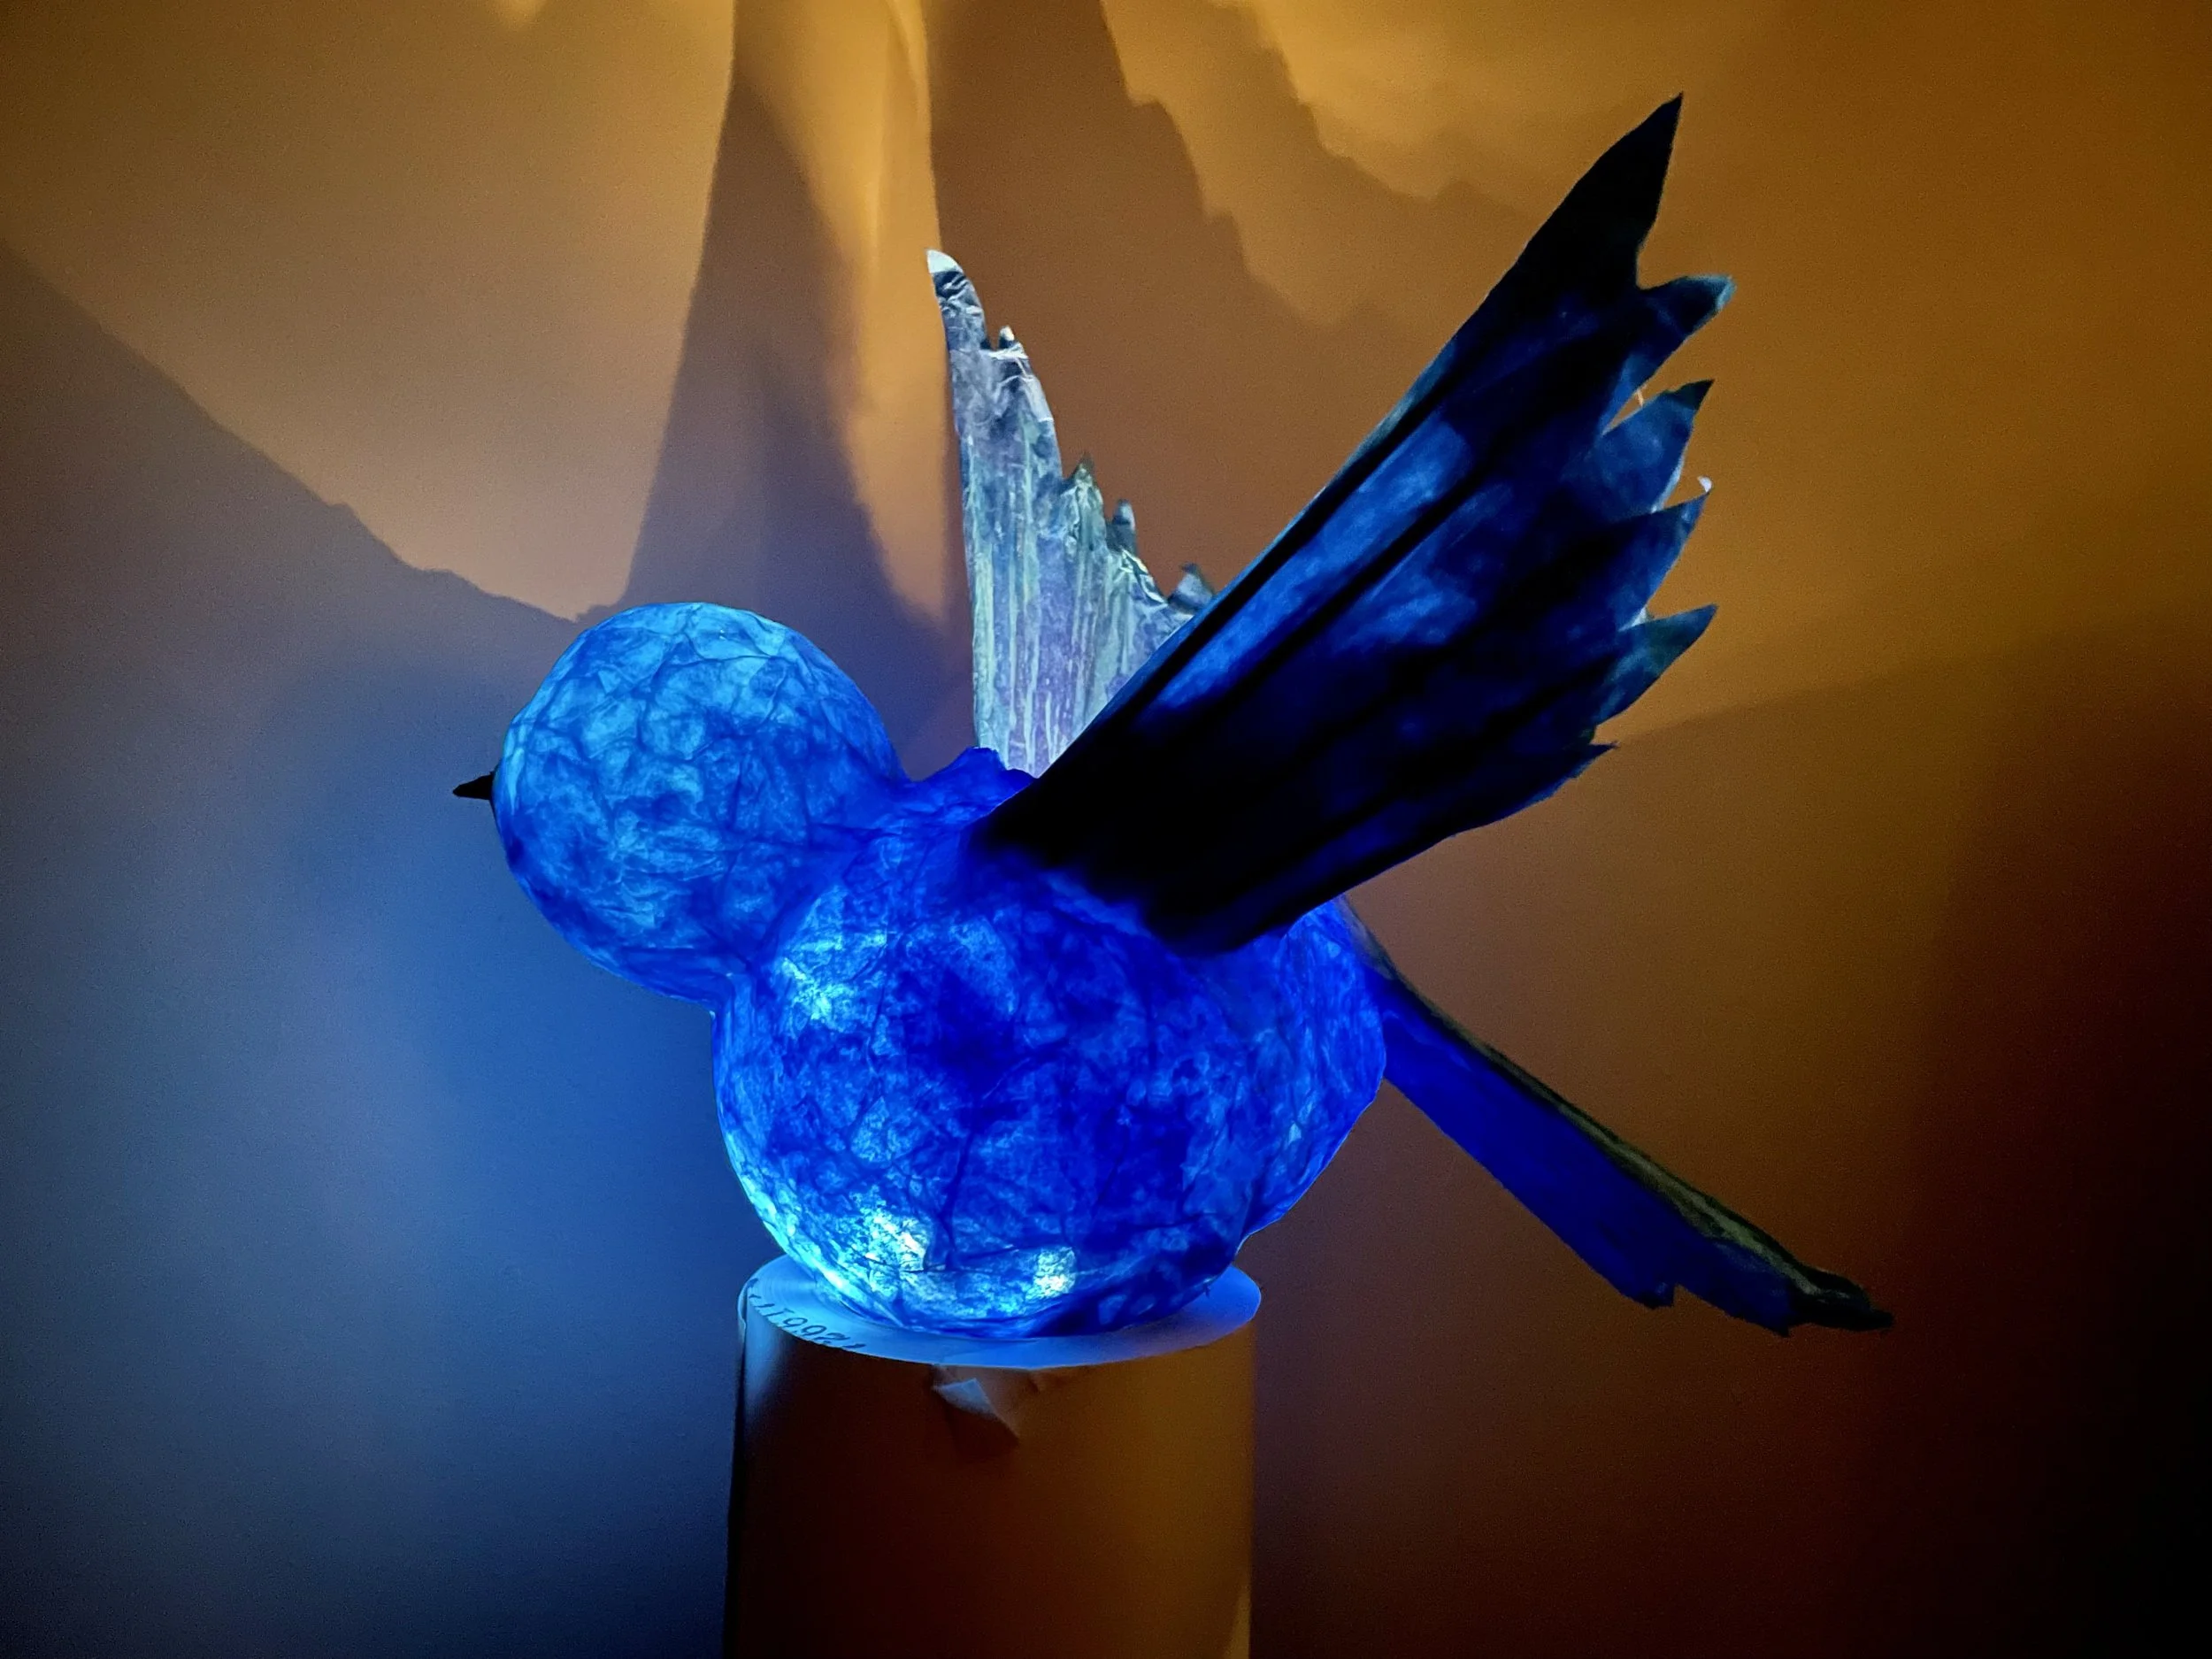
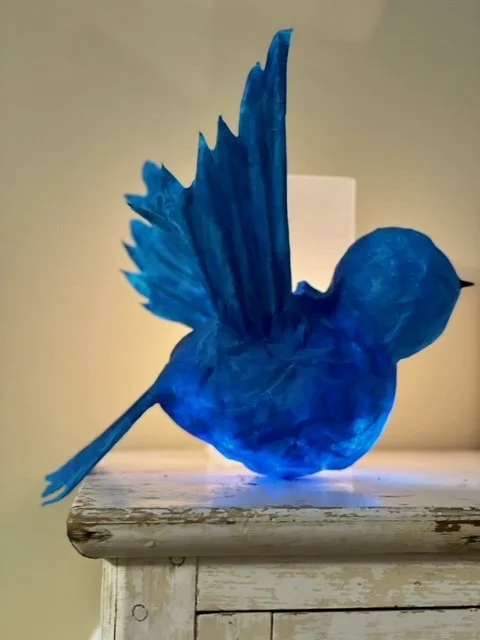
How to build a bird lantern
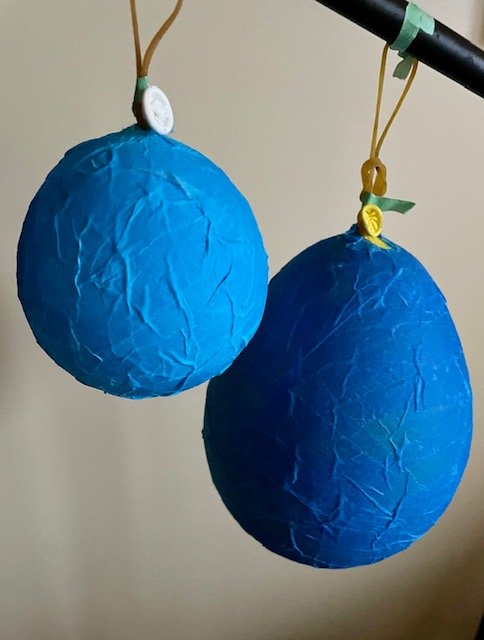
Step 1:
Step 1: Wash 3 complete layers of tissue paper strips onto two balloons, one small and one 8”. Let dry.

Step 2:
Burst both balloons. Attach the small one to the larger at what would be a bird’s head position, the tie end of the big one being the tail. Before attaching cut a circle out of each where they join so the light will pass into the head from the cavity.

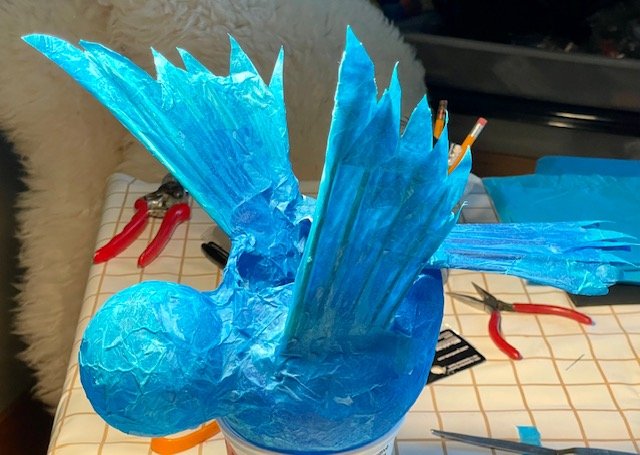
Step 3:
Prepare the wings and the tail. Here I’ve used bamboo skewers but curved slender willow whips would give a different but more natural effect.
Step 4:
Cut an opening on the back behind the head and between the wing position for light installation and operation.
Step 5:
Attach wings and tail. Here I cut slits into the body and installed them by attaching to the interior cavity for extra rigidity. Layer on more tissue strips at the joints to blend them with the body.

Step 6:
Add a beak by making a tiny cut in the head. I used the tip of a skewer which I then papered with black tissue.

Step 7:
Find 2 balance points and attach a line for hanging. Here fishing line was used attached to the wings.
Step 8:
Install appropriate lights. I chose a string of 25 small bulbs powered by 3 AA batteries. (Darker structures require stronger light sources.)
There are so many bird possibilities so why not give it a go?

Ice lanterns: how to
A step-by-step guide to make an ice lantern using a balloon


Photos: Japan Travel
Did you know there’s an ancient tradition in Japan of making ice lanterns? Every February, Akita, Japan transforms into a fairytale landscape dotted with igloo-like structures in a festival dating back 400 years. These snow houses are known as Kamakura and are built in various areas around the city.
The largest Kamakura stand up to three meters high and four meters wide, with the locals welcoming guests inside their candle-lit interior with offerings of mochi rice cakes and amazake (sweet sake). In each Kamakura you'll also come across a small snow shrine, since traditionally these structures acted as refuge for local spirits – in times gone by the festival goers would pray for success and safety.
Plenty of smaller Kamakura act as lanterns guiding the way for passers-by visiting the festival.
from Japan Travel
An upside of the freezing temperatures we’re experiencing is it’s perfect weather to make ice lanterns. There are many ways to make them; we’ve had success using helium-grade balloons. Helium-grade balloons are stronger than regular balloons and necessary because they can be filled with more water.

1.
Fill the balloon to desired size with cool water - ideal 12-18 inch diameter.
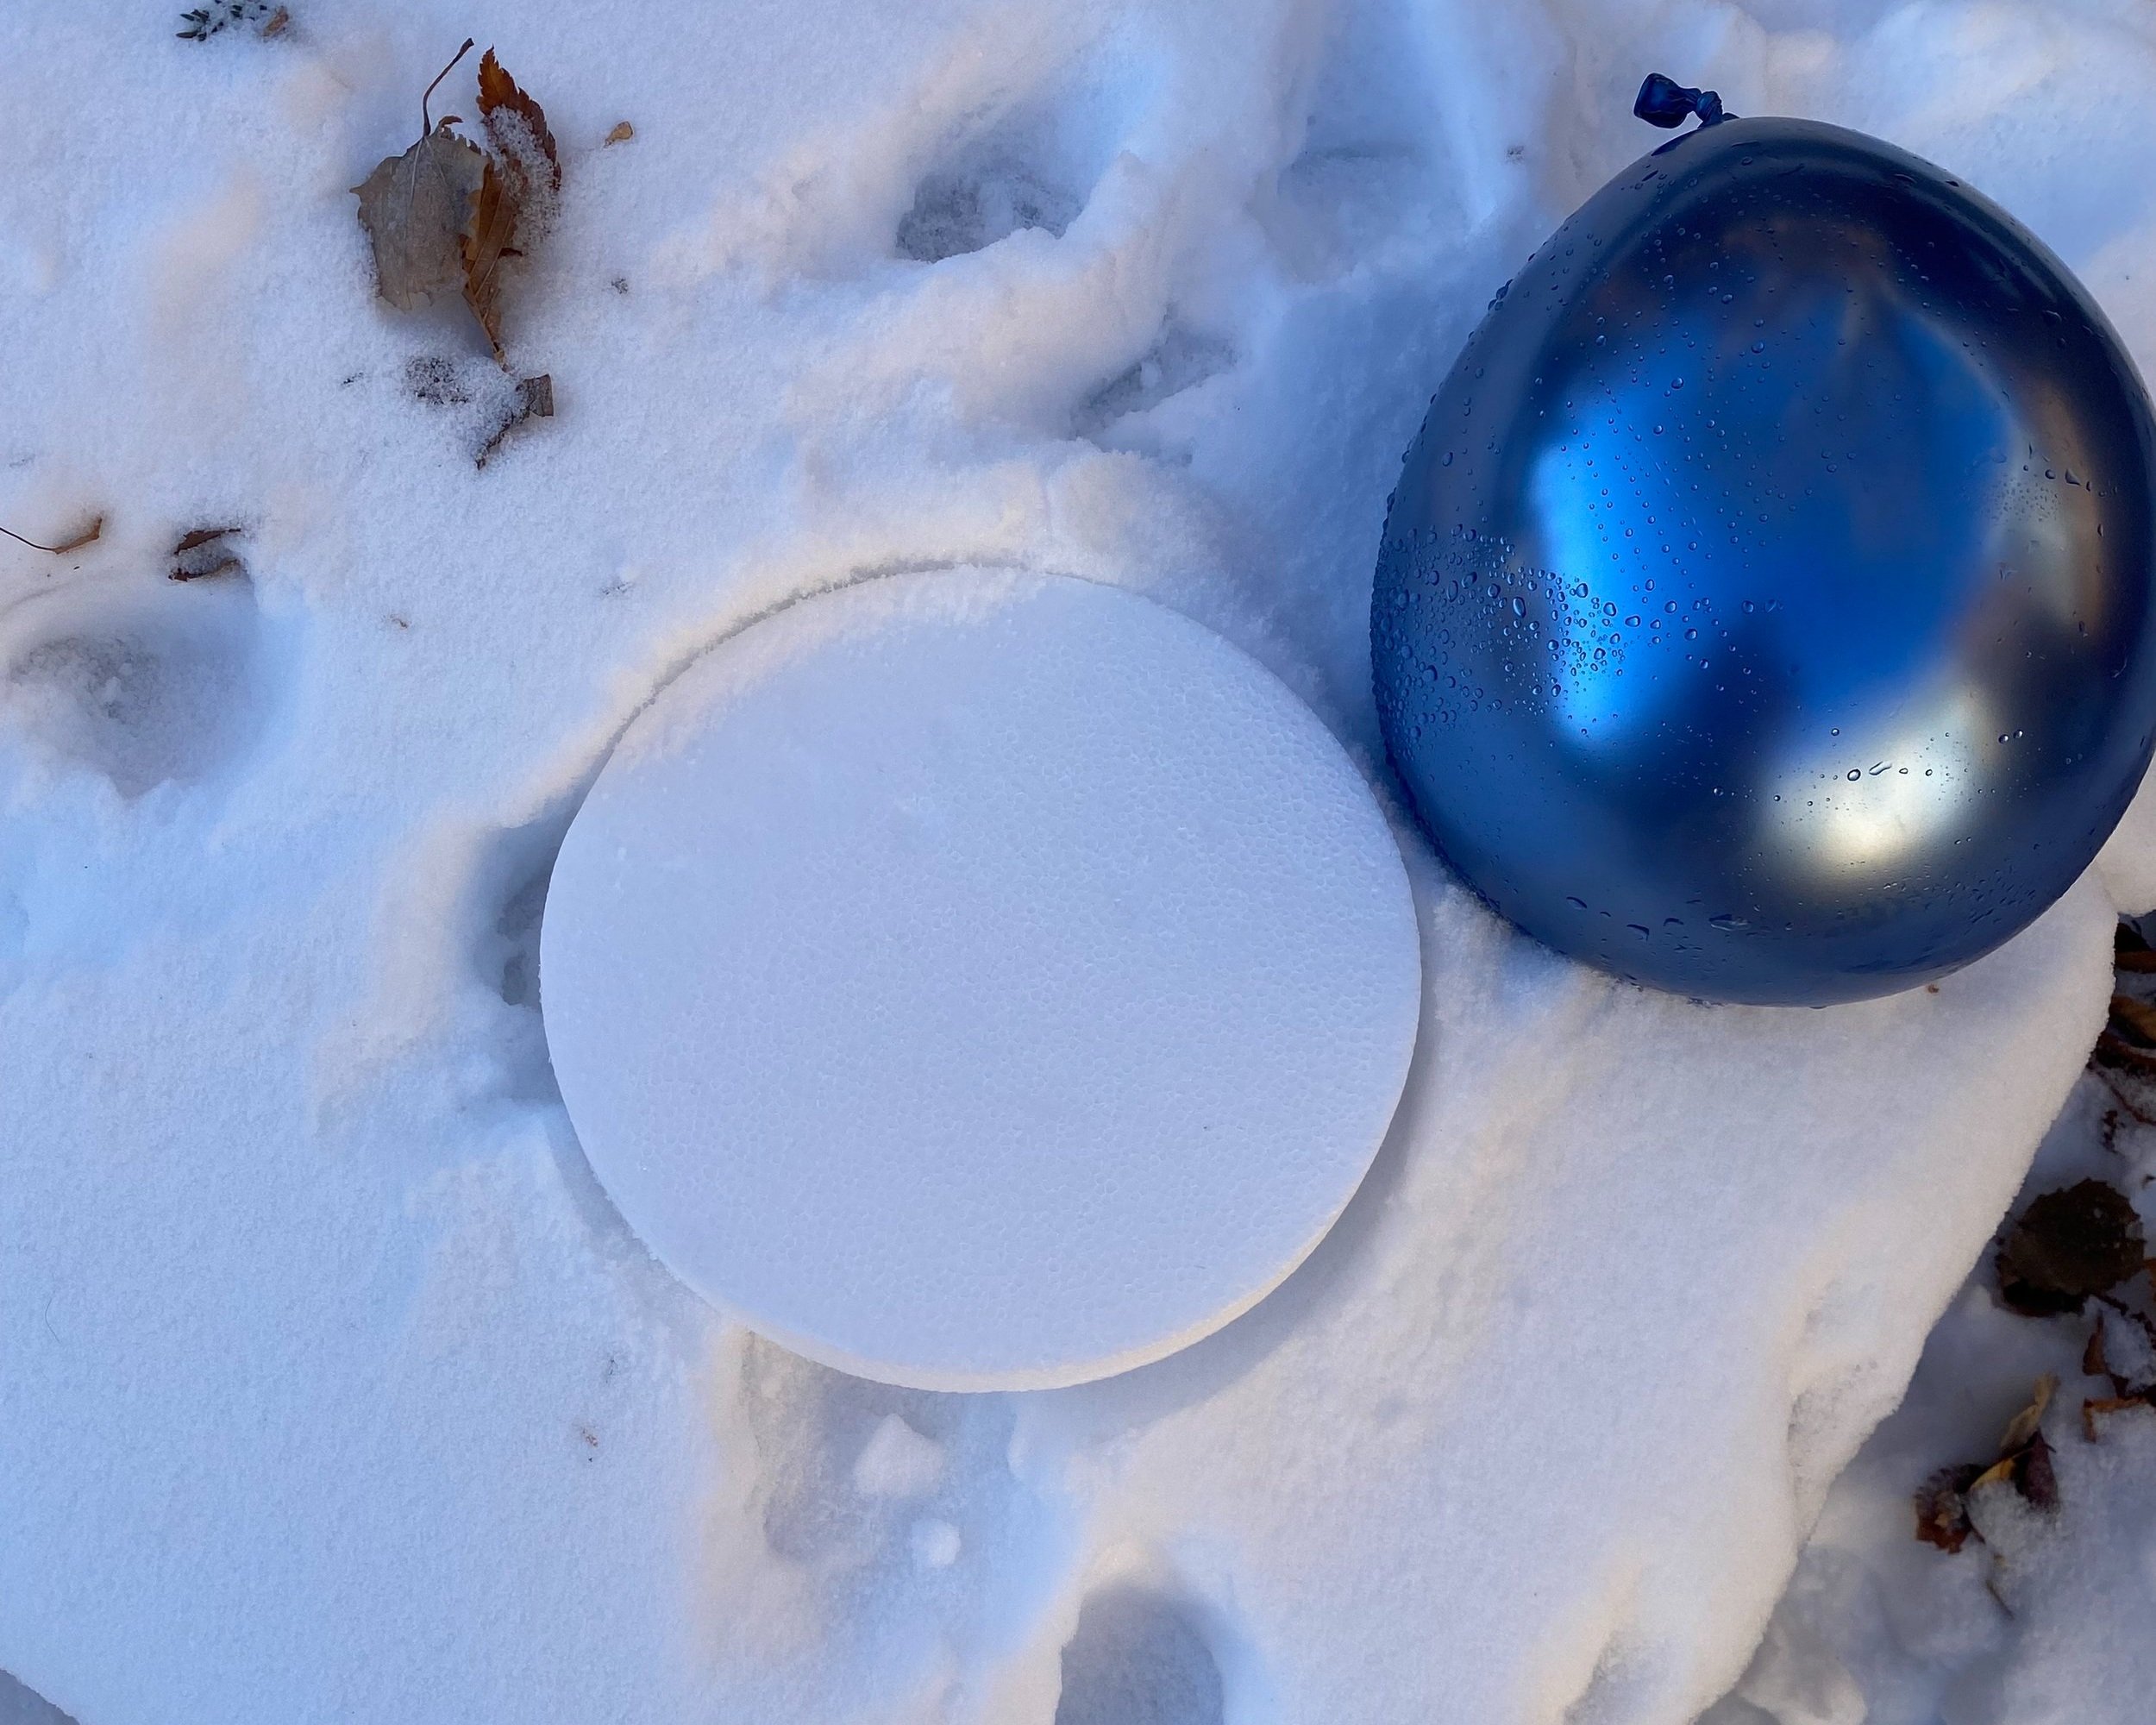
2.
Take your balloon outside. Using a piece of styrofoam or cardboard for a base, place it tie-side down (for nice dome shape). The base is meant to insulate the bottom so it doesn’t freeze.

3.
Pack snow gently around the edges of the balloon so it doesn’t roll off the base, and leave for 8-12 hours depending on temperature.

4.
You’ll know it’s ready when the sides are frozen solid, no more than a centimetre thick. Make sure there’s a good-size ‘cavern’ inside for the candle - be careful not to let the sides get too thick.
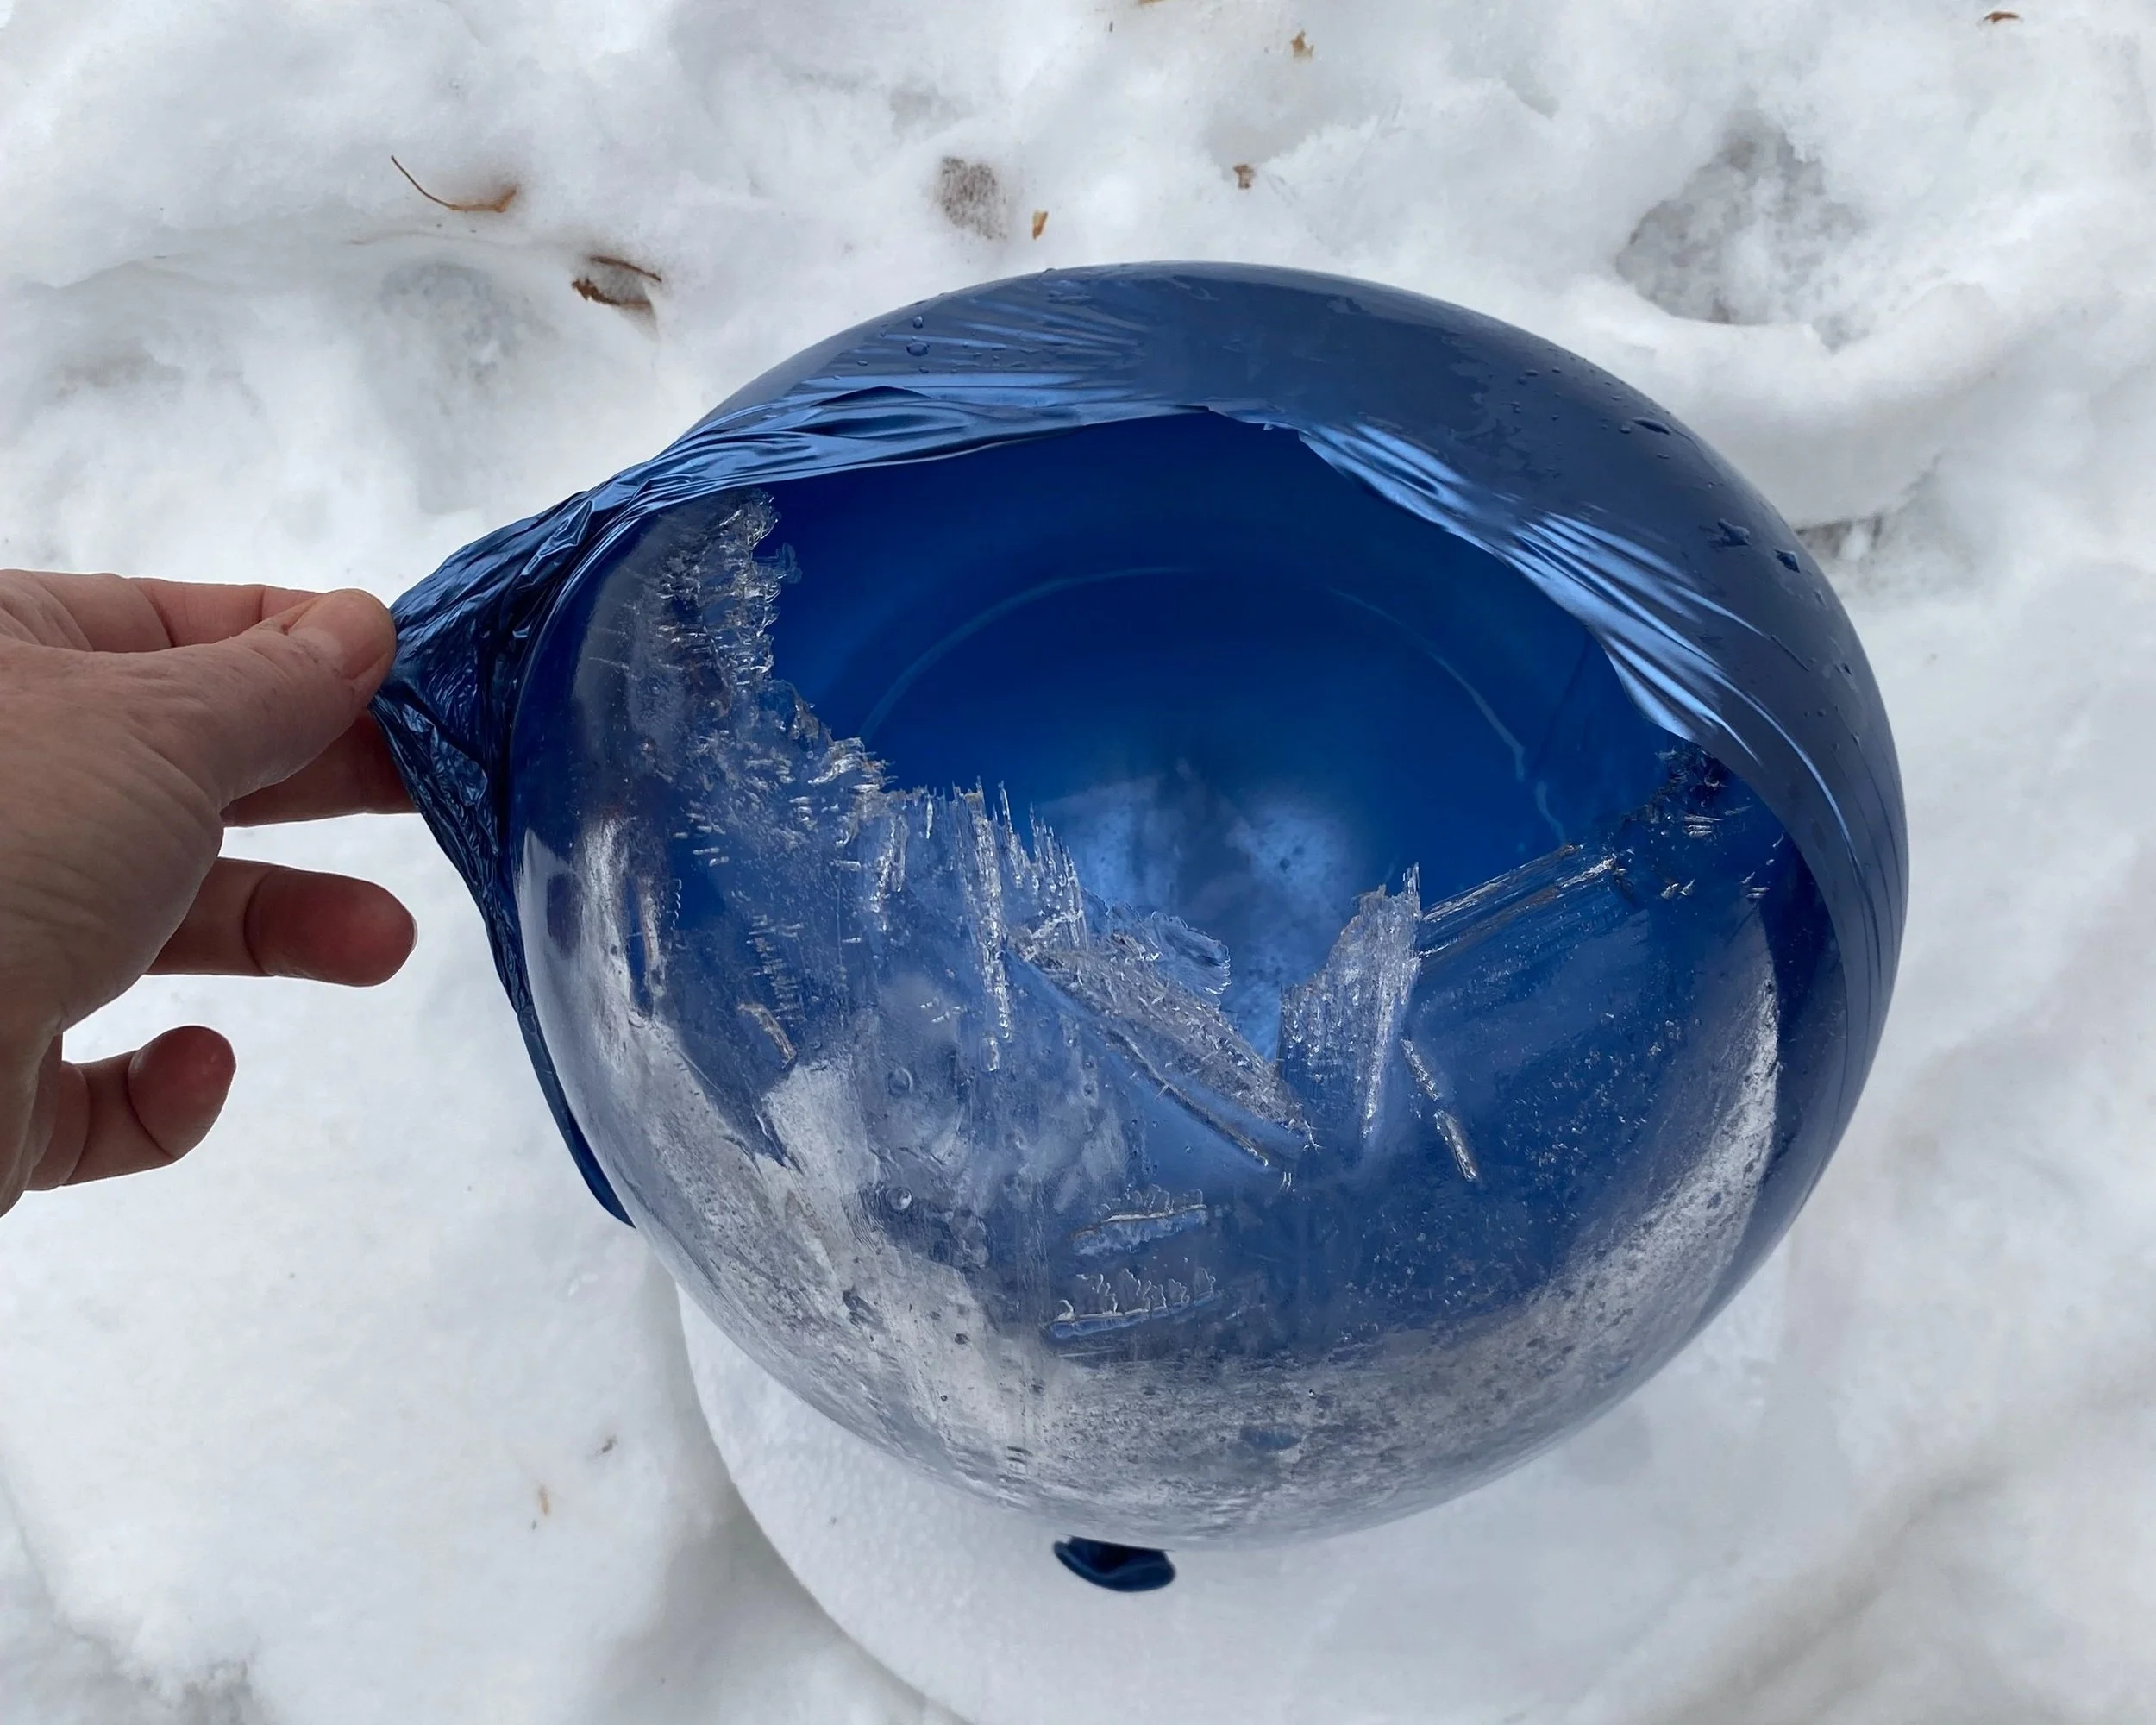
5.
Puncture the balloon and pour out the water.

6.
Drill through the top of the dome, making a ‘chimney’ for the candle to vent.

8.
Light and cover a candle with your ice lantern, enjoy!

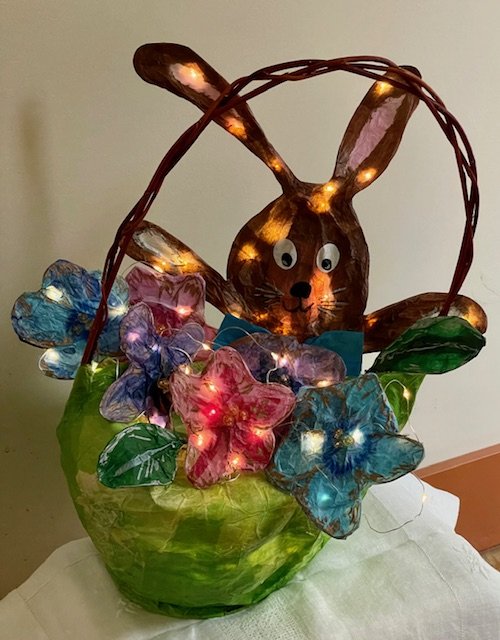
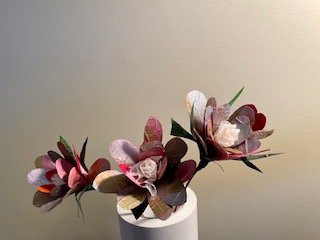
How to make a lantern bouquet

Step 1:
Build the basket. 3 layers of tissue applied with dilute glue to a 12” balloon. Let dry and pop the balloon. Shape the top and add a handle. I used three braided supple willow whips and anchored it to the outside with masking tape covered by more tissue strips.

Step 2:
Prepare 3 12” balloons with 3 layers of tissue each and let dry. For this basket I used one mixed greens, one varied reds and pinks blended with gold and silver metallic tissues and one white.

Step 3:
Make your flowers by cutting petals from the balloons so that the curves contribute.
(For the Iris I made 6 petals.) Having prepared a stem of willow make a centre for the flower by binding a ruffle of paper with masking tape. I used mainly white crepe paper. For the Iris I added detail with strips of maroon tissue and some ink lines. Then bind each petal in sequence to your stem. I added leaf sepals at the base cut from the green balloon and anchored it all with blue and green tissue. I added 2 leaves to each stem wrapping it all tightly with floral tape.
Step 4:
The “rose” blossoms were made the same way but each one has 14 petals.

Step 5:
Add foliage. Similar process of cutting leaf shapes out of the green balloon and taping with masking tape to willow stems and binding with green floral tape. (I used green tissue and dilute glue to cover any gaps where the masking tape showed.)

Step 6:
Decide how you will illuminate it I added 2 mini light strings to the basket cavity leaving the batteries on the outside. Arrange your flowers. I made a grid of fishing line stretched across the opening so the stems remain relatively stable. Then I added 2 more strings of mini lights to the flowers and basket handle.

Step 7:
Attach the battery packs to the outside of the basket for easy access. I made an attached pocket out of card stock and disguised it with matching tissues washed on.
Step 8:
Enjoy your creation. This lantern looks equally good illuminated or not.

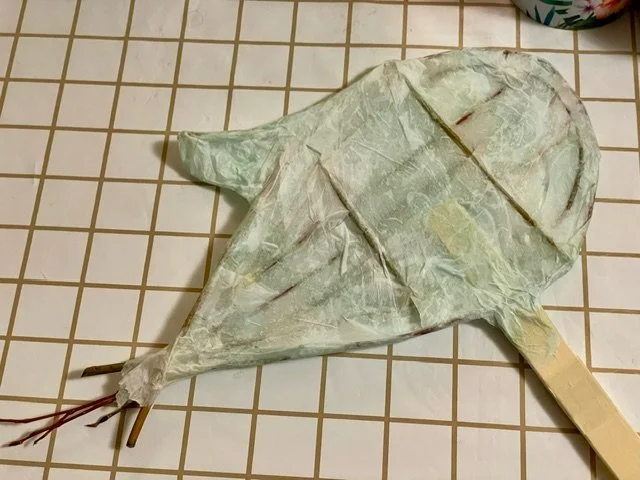
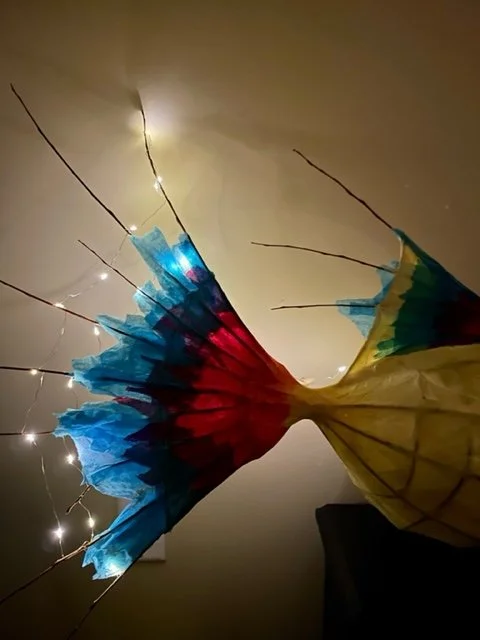
How to make a fish with a balloon and willow.

Step 1:
Blow up a balloon and create a frame around it with supple willow whips.
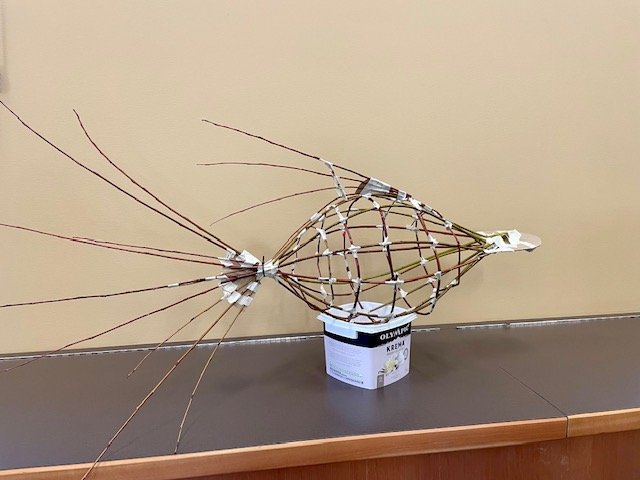
Step 2:
Adjust the frame to take its final shape, anchoring it well at all cross points with masking tape. Then pop the balloon.
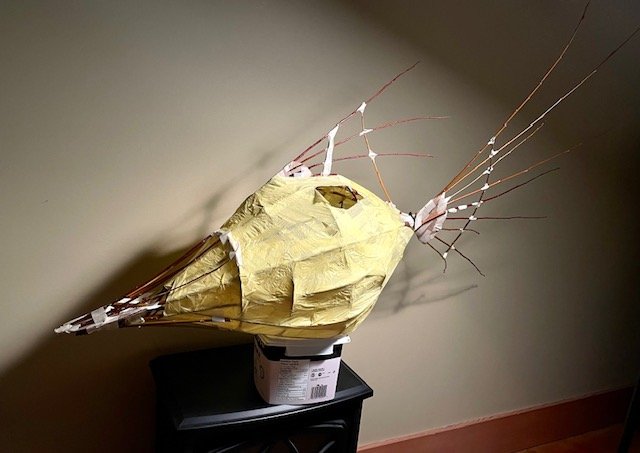
Step 3:
Wash your first layer of tissue strips on with dilute white glue. I chose soft yellow for the glow factor.
Remember to leave a space to insert your hand for lights.
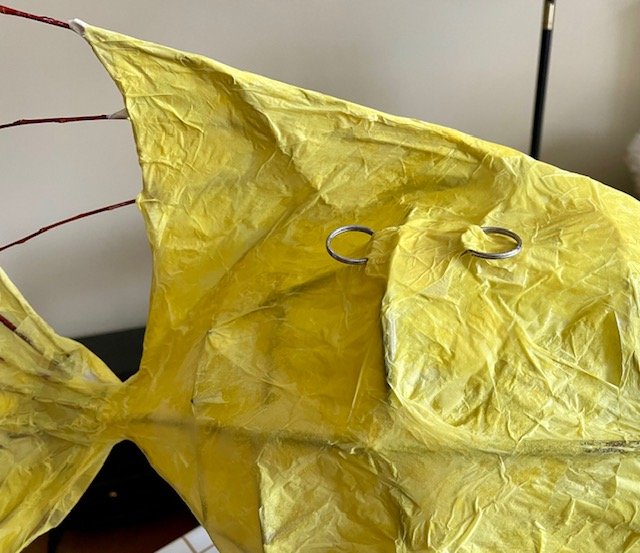
During Step 3:
It’s a good idea to also install anchor points if you plan to hang this lantern.

Step 4:
Choose your paper “palette” and begin to play. Keep in mind that finally it’s all about the light and how it will look lit in the dark.
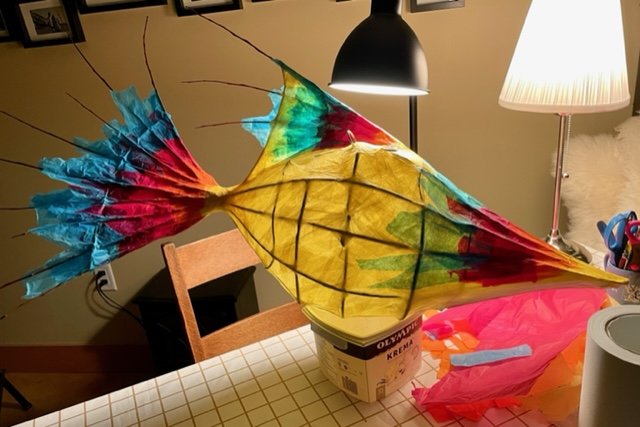
Step 5:
Remembering that tissue layers act just like washes of paint, know that you can blend them to create many more tones than you have paper.

Step 6:
Build up layers allowing time to dry between for ease of application. Three is ideal for transparency and stability; 4 layers is stronger but less light passes through. Whatever it is, the way you tell your story online can make all the difference.
Step 7:
Thinking ahead I’ve added a string of waterproof mini lights as I layered up the tail, with the battery in the belly. It worked very well on first attempt. The belly will be illuminated by a more powerful light.
Step 8:
Install the lights and take it somewhere dark and marvel at the beauty of your creation!

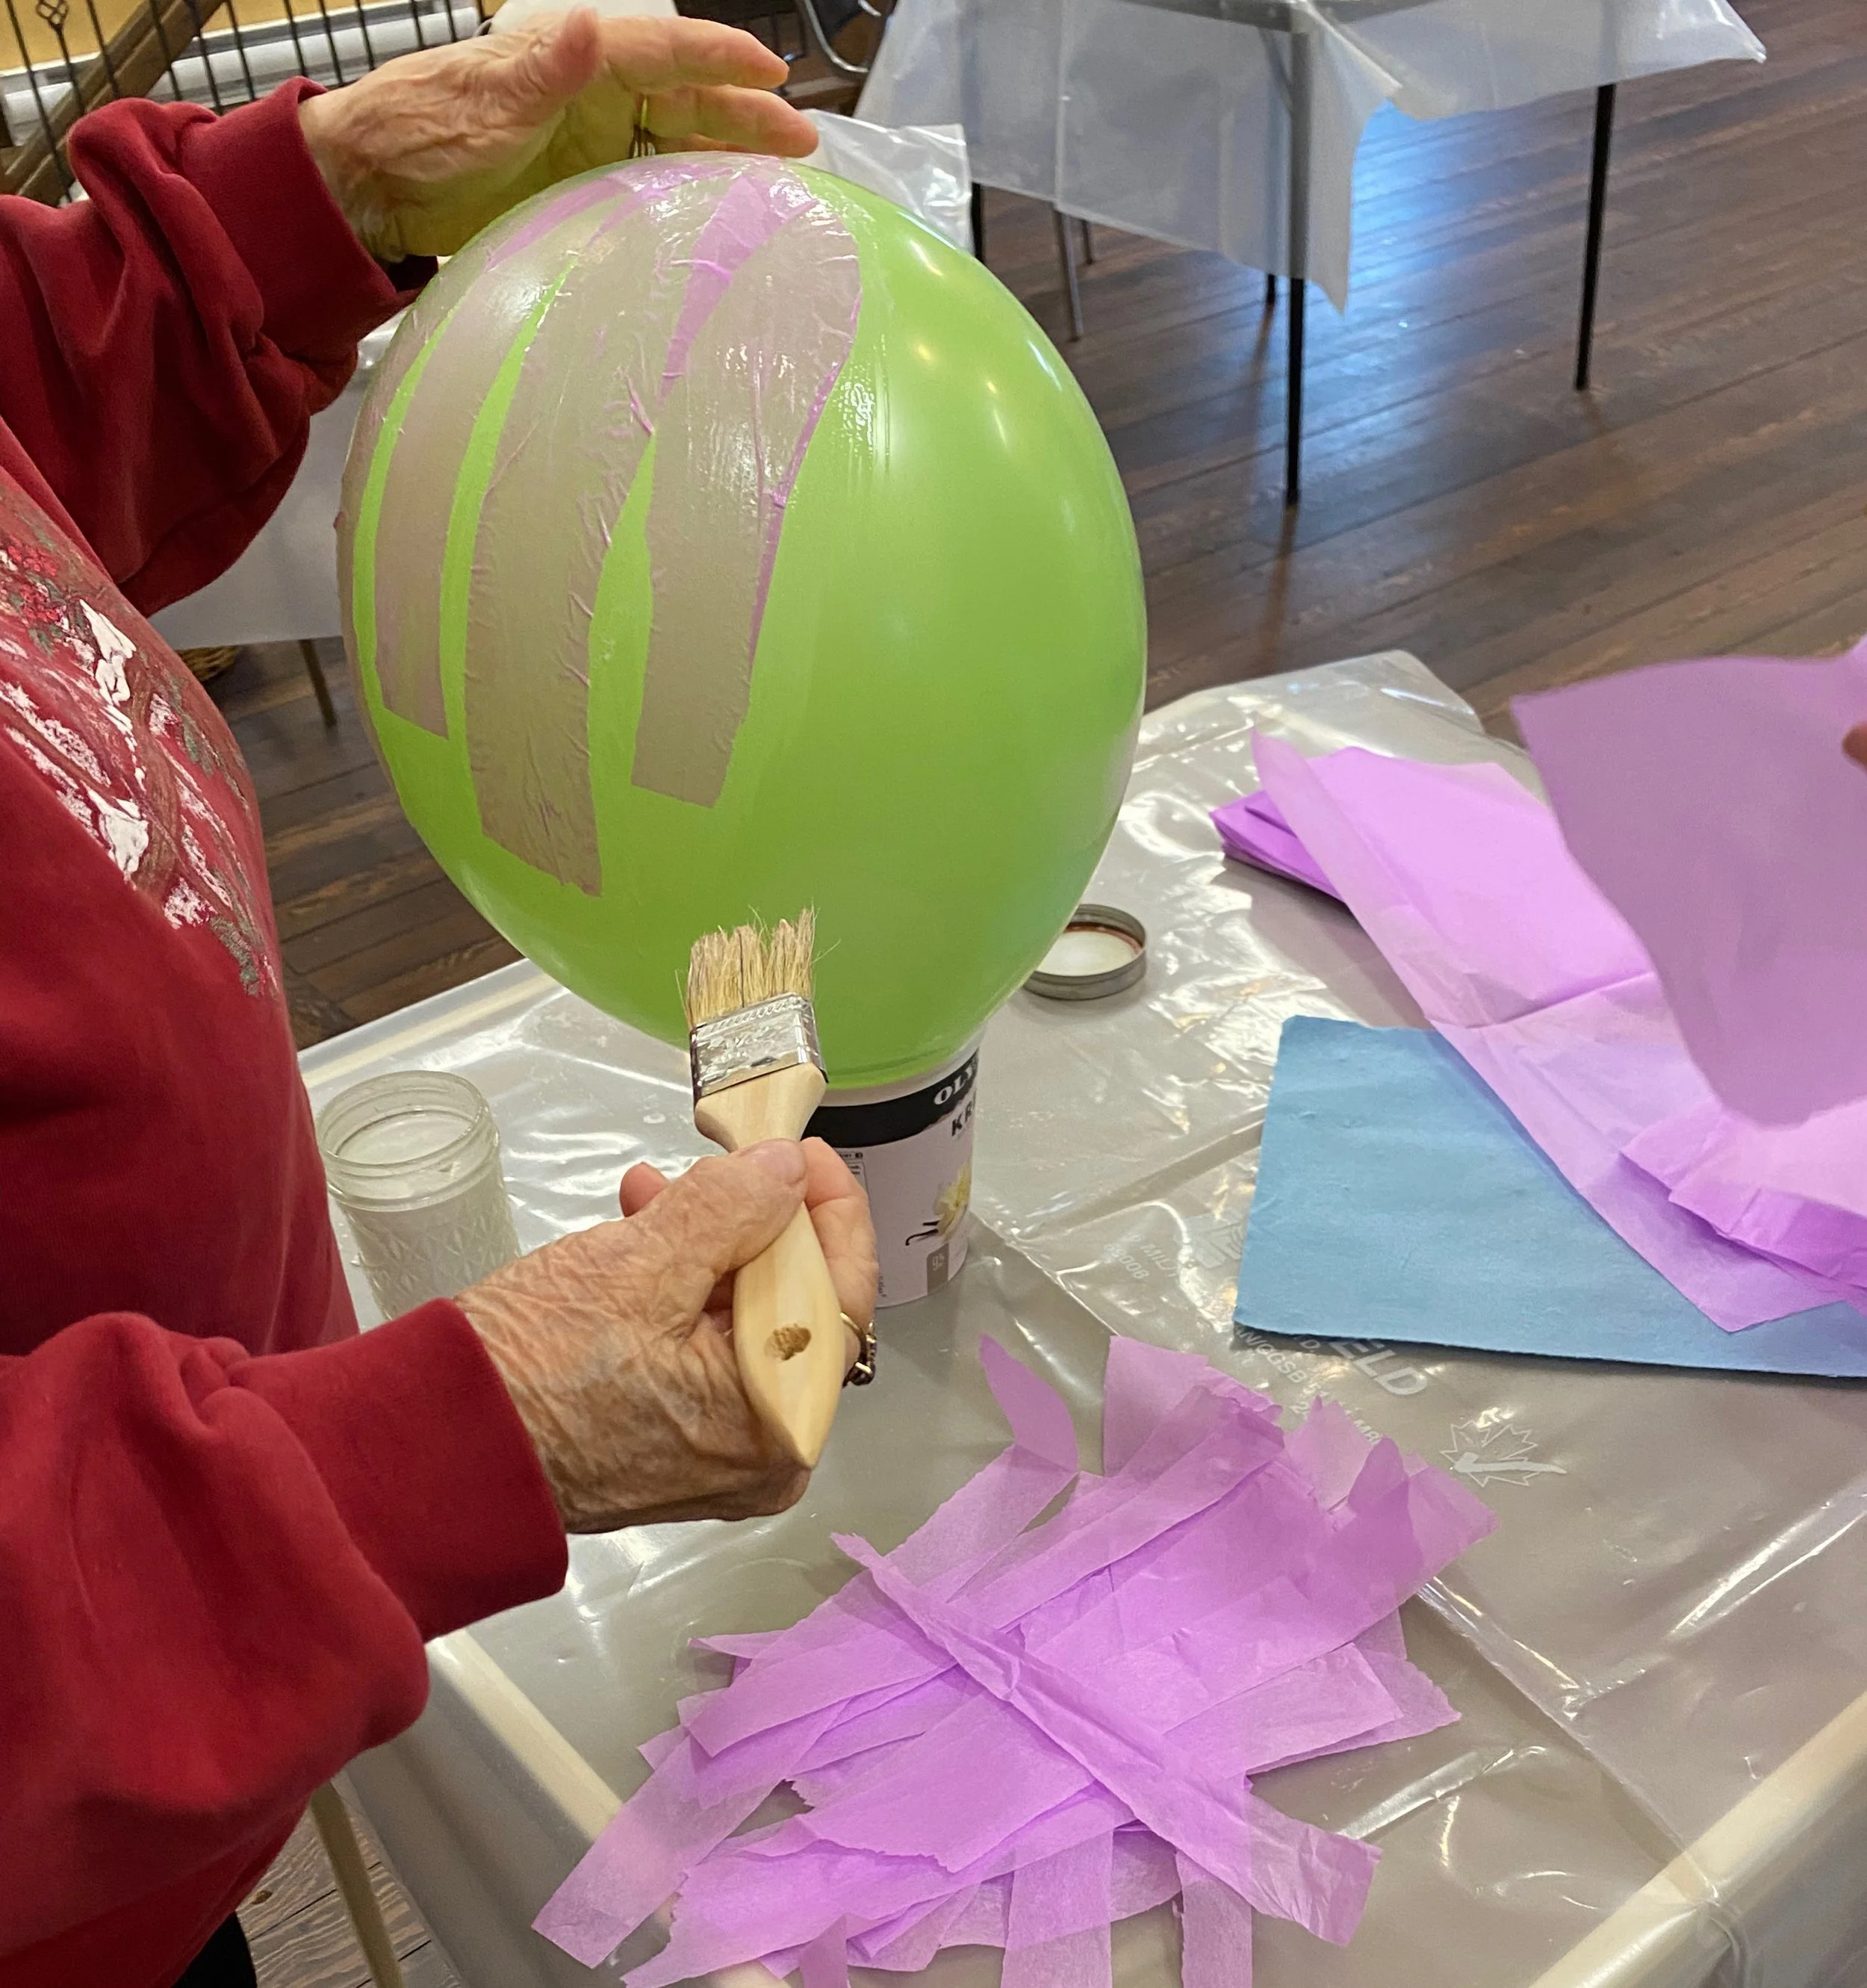
How to Make a Balloon Lantern
It all begins with an idea.


It all begins with an idea.
One of the easiest ways to make a lantern is to use a balloon as your foundation. Simply blow up a balloon and set it in a bowl to steady it. Tear the tissue paper into approximately 1” x 8” strips and set to the side. Using white, all purpose glue, watered down to a creamy consistency, brush onto the balloon and slowly layer the tissue until the balloon is covered leaving an opening at the balloon tie.
You will want to apply 3 layers to the balloon before doing the most fun part! Popping it! Too many layers and the light will not shine through the tissue paper. Too few layers and the lantern will be too flimsy.